
Valentine’s Day White Chocolate Fudge Recipe
Introduction
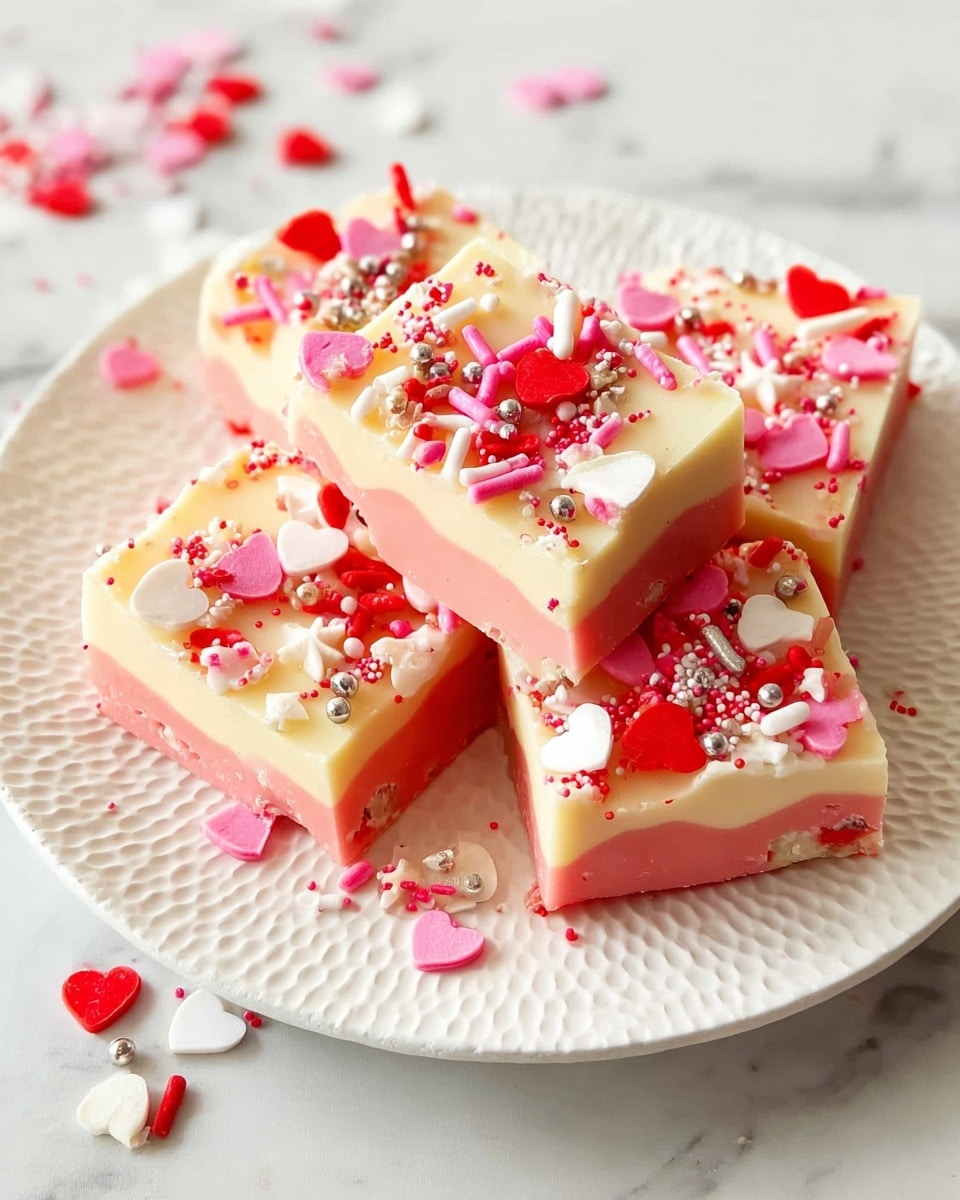
This Valentine’s Day White Chocolate Fudge is a creamy, sweet treat perfect for sharing with loved ones. Layered with a softly colored top and classic white chocolate base, it makes a charming gift or festive dessert.
Ingredients
- 3 cups white chocolate chips
- 14 ounces sweetened condensed milk (1 can)
- ⅛ teaspoon salt
- 1 teaspoon pure vanilla extract
- 2-4 drops red gel food coloring
Instructions
- Step 1: Line an 8×8-inch pan with parchment paper, letting the paper extend over the edges for easy removal later.
- Step 2: In a large microwave-safe bowl, combine 1 ½ cups white chocolate chips, half the sweetened condensed milk, and half the salt. Stir to mix.
- Step 3: Microwave this mixture in 30-second intervals, stirring in between, until mostly melted. Stir thoroughly until smooth and fully melted.
- Step 4: Stir in the vanilla extract, then add 2-4 drops of red gel food coloring until you reach your desired shade. Mix well to incorporate.
- Step 5: Spread this colored fudge evenly in the prepared pan and let it set for about 30 minutes.
- Step 6: Repeat the melting process with the remaining white chocolate chips, sweetened condensed milk, and salt, but do not add food coloring this time. Pour the plain fudge over the set colored layer.
- Step 7: Decorate the top with Valentine’s Day sprinkles, pressing them gently into the fudge so they stick. Allow the fudge to set for 2 hours until firm.
- Step 8: Once firm, lift the fudge out of the pan using the parchment paper. Place on a cutting board and cut into squares.
Tips & Variations
- Use gel food coloring to avoid altering the fudge’s consistency. You can substitute red with pink or purple for a different look.
- Try adding chopped nuts or dried cranberries for extra texture and flavor.
- If you don’t have a microwave, gently melt the chocolate and sweetened condensed milk over a double boiler, stirring until smooth.
Storage
Store the fudge in an airtight container at room temperature for up to one week. Keep it away from direct sunlight and heat. For longer storage, refrigerate and bring to room temperature before serving. To re-soften slightly, let it sit at room temperature for 10-15 minutes.
How to Serve

Serve this delicious recipe with your favorite sides.
FAQs
Can I use milk or dark chocolate instead of white chocolate?
Yes, you can substitute with milk or dark chocolate chips, but the flavor and color will change accordingly. Adjust amounts and melting times as needed.
How do I prevent the fudge from becoming grainy?
Heat the mixture gently and stir frequently while melting to avoid burning. Using good quality chocolate and proper melting technique helps ensure a smooth texture.
Print
Valentine’s Day White Chocolate Fudge Recipe
- Total Time: 2 hours 42 minutes
- Yield: 64 servings 1x
Description
This Valentine’s Day White Chocolate Fudge is a creamy, festive treat perfect for sharing with loved ones. Made with smooth white chocolate chips, sweetened condensed milk, and a touch of vanilla, it’s beautifully layered with a hint of red food coloring and topped with colorful Valentine’s sprinkles. Easy to prepare using the microwave, this fudge sets up firm and sweet, ideal for parties, gifts, or a special holiday indulgence.
Ingredients
Fudge Base
- 3 cups white chocolate chips
- 14 ounces sweetened condensed milk (1 can)
- ⅛ teaspoon salt
- 1 teaspoon pure vanilla extract
- 2–4 drops red gel food color
- Valentine’s Day sprinkles (amount as desired for topping)
Instructions
- Prepare Pan: Line an 8×8 inch pan with parchment paper, ensuring the paper extends beyond the edges to allow easy removal of the fudge after it sets.
- First Layer Mixture: In a large microwave-safe bowl, combine 1 ½ cups of white chocolate chips, half the sweetened condensed milk (7 ounces), and half the salt (⅟16 teaspoon). Stir to combine.
- Microwave First Layer: Microwave the mixture in 30-second increments, stirring between each until mostly melted. Then stir continuously until fully melted and smooth.
- Add Flavor and Color: Stir in the vanilla extract, then add 2-4 drops of red gel food coloring to achieve desired hue. Mix thoroughly to incorporate the color evenly.
- Set First Layer: Pour and spread the colored fudge mixture into the bottom of the prepared pan in an even layer. Let it sit at room temperature for about 30 minutes to set firmly.
- Second Layer Mixture: Repeat the melting process with the remaining 1 ½ cups white chocolate chips, sweetened condensed milk, and salt, but do not add food coloring this time. Microwave similarly until smooth.
- Spread Second Layer: Pour this white fudge mixture evenly over the set colored layer.
- Add Sprinkles: Sprinkle Valentine’s Day sprinkles generously over the top layer. Use your hands to gently press them into the fudge, ensuring they stick.
- Final Setting: Allow the fudge to set for 2 hours at room temperature until firm.
- Cut and Store: Once firm, lift the fudge out of the pan using the parchment paper edges. Place on a cutting board and cut into 64 squares. Store in an airtight container at room temperature.
Notes
- Microwave times may vary; stir well between intervals to prevent burning.
- For a firmer fudge, you may refrigerate after initial setting steps, but room temperature setting is sufficient.
- Use gel food coloring instead of liquid to avoid altering fudge texture.
- Sprinkles add a festive touch but can be omitted or substituted as desired.
- Fudge should be stored at room temperature and consumed within 1 week for optimal freshness.
- Prep Time: 15 minutes
- Cook Time: 15 minutes
- Category: Dessert
- Method: Microwaving
- Cuisine: American
Keywords: Valentine’s day fudge, white chocolate fudge, holiday dessert, microwave fudge, easy fudge recipe

