
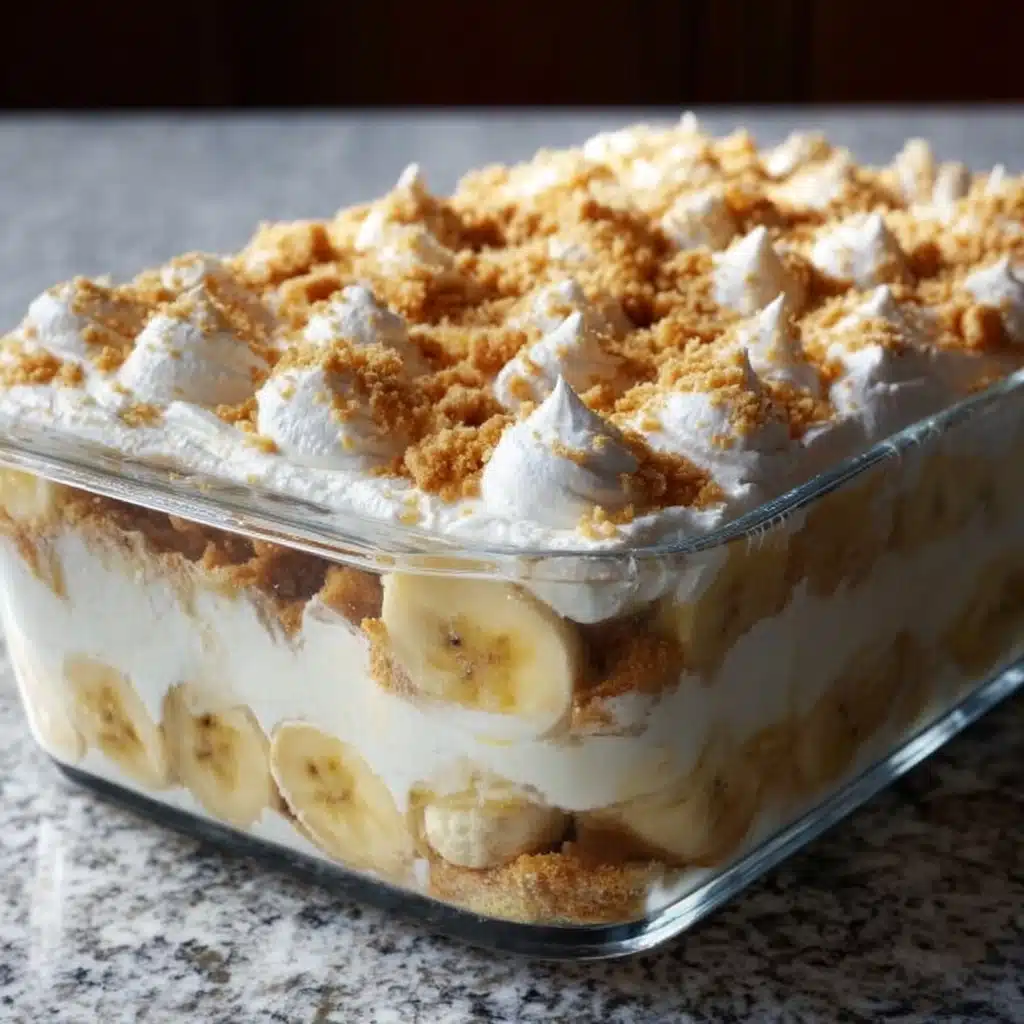
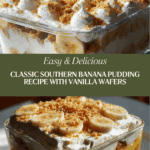
The Best Banana Pudding Ever Recipe
If you’re on the hunt for a dessert that feels like a warm hug from the South, look no further than The Best Banana Pudding Ever: 7 Reasons You’ll Love It! This recipe brings together creamy, dreamy layers of velvety pudding, sweet banana slices, and crisp vanilla wafers that all meld together into a luscious treat you just can’t stop scooping up. Whether it’s a family gathering or a lazy Sunday indulgence, this banana pudding hits every note perfectly with comforting flavors and that perfect texture combo that keeps everyone coming back for more.
Ingredients You’ll Need
Don’t let the simple list fool you; each ingredient plays a crucial role in building the flavor and texture that make this pudding a standout. From the crisp vanilla wafers for crunch to the silky pudding base, every piece is essential to your final masterpiece.
- Vanilla wafers: Use a classic box for that nostalgic crunch and perfect sweetness contrast.
- Ripe bananas: Fresh and sweet slices provide natural creaminess and flavor intensity.
- Sugar: Sweetens the pudding beautifully without overpowering the bananas.
- All-purpose flour: Thickens the pudding to that luscious, spoonable consistency.
- Salt: Just a pinch to balance and enhance all the sweet flavors.
- Milk: The creamy base that brings everything together and keeps the pudding smooth.
- Egg yolks: Enrich the pudding and help achieve that silky texture.
- Vanilla extract: Adds warmth and depth with a floral, sweet aroma.
- Heavy whipping cream: Whipped to soft peaks for a light, airy topping that finishes the pudding perfectly.
How to Make The Best Banana Pudding Ever: 7 Reasons You’ll Love It!
Step 1: Prepare the pudding base
Start by combining the sugar, flour, and salt in a saucepan—these dry ingredients form the foundation of your pudding. Gradually whisk in the milk to ensure a smooth batter free of lumps. Cook the mixture over medium heat, stirring constantly until it thickens to a silky custard. This step builds the creamy body of the pudding that you’ll absolutely adore.
Step 2: Incorporate egg yolks
To get that rich, velvety texture, whisk in the egg yolks and continue to cook for two more minutes. This enriches the pudding and gives it a beautiful golden color while making it incredibly smooth. Removing it from heat at just the right moment is key to preventing curdling.
Step 3: Add vanilla extract
Stir in the vanilla extract off the heat to seal in the sweet aroma and deep flavor. This little addition elevates the entire dessert, making it feel homemade and special—something you’ll notice with every bite in The Best Banana Pudding Ever: 7 Reasons You’ll Love It!
Step 4: Assemble the layers
Grab your favorite serving dish and start layering with vanilla wafers, then banana slices, followed by a generous spoonful of pudding. Repeat this process until all your ingredients are used, creating beautiful, enticing layers that showcase the pudding’s irresistible texture contrast.
Step 5: Whip the heavy cream
Beat the heavy cream until stiff peaks form to craft a light, fluffy top layer that adds an airy finish and balances the pudding’s density. Spreading this luscious cream over the assembled pudding makes the dish look as good as it tastes.
Step 6: Chill it well
Refrigerate the pudding for at least four hours, or overnight if you can wait. Chilling lets all the layers meld perfectly, softening the wafers and intensifying the banana flavor—this patience rewards you with The Best Banana Pudding Ever: 7 Reasons You’ll Love It! in every forkful.
How to Serve The Best Banana Pudding Ever: 7 Reasons You’ll Love It!
Garnishes
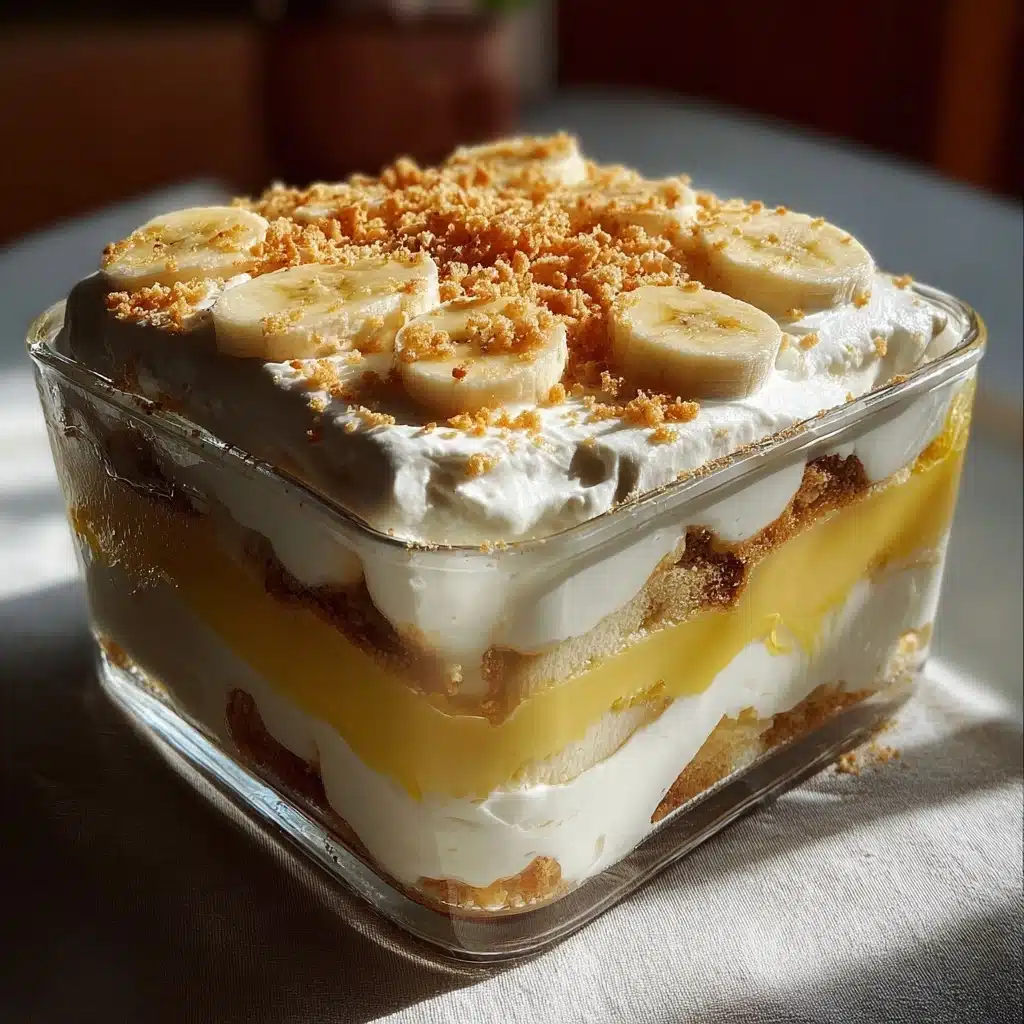
Fresh banana slices and a sprinkle of crushed vanilla wafers on top add a lovely finishing touch. You can also dust a little cinnamon or nutmeg for warmth. These simple garnishes not only look fantastic but add an inviting aroma and extra texture that makes each serving irresistible.
Side Dishes
This creamy dessert pairs beautifully with light, fruity accompaniments like mixed berries or a citrus salad. If you’re hosting, consider serving it alongside a cup of coffee or tea to balance the sweetness and create a well-rounded ending to any meal.
Creative Ways to Present
Take The Best Banana Pudding Ever: 7 Reasons You’ll Love It! up a notch by serving it in individual jars or clear glasses to show off those gorgeous layers. Alternatively, try a trifle bowl if you’re feeding a crowd—it makes for an impressive centerpiece that invites everyone to dig in.
Make Ahead and Storage
Storing Leftovers
Cover your banana pudding tightly with plastic wrap and store it in the refrigerator. It keeps well for up to three days, though it’s so tempting you might not have leftovers! Just know the flavors deepen and the wafers soften more with time.
Freezing
While freezing banana pudding isn’t ideal because of the bananas’ texture changes, you can freeze the pudding base before assembly. Thaw it completely in the refrigerator before layering with fresh bananas and wafers for best results.
Reheating
This pudding is best served chilled, so reheating isn’t recommended—it might break the delicate texture. Instead, allow refrigerated leftovers to come to room temperature for a short while to enhance the flavors before serving.
FAQs
Can I use a different type of cookie instead of vanilla wafers?
Absolutely! While vanilla wafers provide that iconic crunch and flavor, graham crackers or shortbread cookies can also work wonderfully, giving your pudding a unique twist you might just fall in love with.
How ripe should the bananas be?
Choose bananas that are ripe but firm, with some yellow and a few brown spots. They’ll be sweet and flavorful but still hold their shape nicely in the pudding layers without turning mushy.
Is there a way to make this banana pudding vegan?
Yes! Swap the milk for a creamy plant-based alternative like coconut milk, replace the egg yolks with cornstarch or a vegan egg replacer, and use whipped coconut cream instead of heavy whipping cream. The texture might differ slightly but the flavor will still be delightful.
How long does the pudding need to chill?
For the best results, chill the pudding for at least four hours, though overnight is preferred if possible. This resting time lets the flavors meld beautifully and softens the wafers into tender morsels.
Can I prepare this pudding in advance for a party?
Definitely! The Best Banana Pudding Ever: 7 Reasons You’ll Love It! actually tastes better when made a day ahead. Just assemble it the day before, keep it chilled, and it’ll be a crowd-pleaser that’s ready when you are.
Final Thoughts
I can’t recommend The Best Banana Pudding Ever: 7 Reasons You’ll Love It! highly enough. It’s the kind of dessert that feels like home, wrapped in layers of creamy pudding, sweet bananas, and crunchy wafers. Whether you’re making it for your nearest and dearest or just treating yourself, this banana pudding promises pure joy with every bite. So go on, give it a try—you’re going to love it!
Print
The Best Banana Pudding Ever: 7 Reasons You’ll Love It! Recipe
- Total Time: 4 hours 35 minutes
- Yield: 8 servings 1x
- Diet: Vegetarian
Description
This classic banana pudding recipe layers creamy vanilla pudding with ripe bananas and crunchy vanilla wafers for a deliciously nostalgic dessert that’s easy to prepare and perfect for any occasion. Rich, smooth, and sweet, it’s a comforting treat that combines the best flavors and textures in every bite.
Ingredients
Base Ingredients
- 1 box of vanilla wafers (about 12 oz)
- 4 ripe bananas, sliced
Pudding Mixture
- 1 cup of sugar
- 1/2 cup of all-purpose flour
- 1/4 teaspoon of salt
- 4 cups of whole milk
- 3 large egg yolks
- 1 teaspoon of vanilla extract
Topping
- 1 cup of heavy whipping cream
Instructions
- Combine Dry Ingredients: In a medium saucepan, combine the sugar, all-purpose flour, and salt, ensuring they are evenly mixed to prevent lumps.
- Add Milk and Cook: Gradually whisk in the milk to the dry ingredients, stirring constantly over medium heat until the mixture thickens into a smooth pudding consistency.
- Incorporate Egg Yolks: Whisk the egg yolks in a small bowl, then gradually add a few spoonfuls of the hot pudding mixture to temper the yolks. Pour the tempered yolks back into the saucepan and cook for an additional 2 minutes while stirring continuously.
- Finish Pudding Base: Remove the saucepan from heat and stir in the vanilla extract to infuse flavor throughout the pudding.
- Assemble Layers: In a serving dish, alternately layer a single layer of vanilla wafers, followed by a layer of sliced bananas, and then a layer of the pudding mixture.
- Repeat Layers: Continue layering wafers, bananas, and pudding until all ingredients are used, finishing with a pudding layer on top.
- Prepare Whipped Cream: Beat the heavy whipping cream with an electric mixer until stiff peaks form, then spread it evenly over the top of the pudding layers.
- Chill: Cover the dish and refrigerate for at least 4 hours to allow flavors to meld and the pudding to set completely before serving.
Notes
- Use ripe bananas for the best natural sweetness and flavor.
- To prevent banana slices from browning, you can lightly brush them with lemon juice before layering.
- For a lighter version, substitute half-and-half for the heavy cream in the topping.
- This dessert can be made a day ahead and stored covered in the refrigerator.
- Ensure constant stirring while cooking the pudding to avoid lumps and burning.
- Prep Time: 20 minutes
- Cook Time: 15 minutes
- Category: Dessert
- Method: No-Bake, Stovetop Cooking
- Cuisine: American Southern
Nutrition
- Serving Size: 1 cup
- Calories: 320
- Sugar: 32g
- Sodium: 150mg
- Fat: 15g
- Saturated Fat: 9g
- Unsaturated Fat: 5g
- Trans Fat: 0g
- Carbohydrates: 42g
- Fiber: 2g
- Protein: 5g
- Cholesterol: 110mg
Keywords: banana pudding, classic dessert, vanilla wafers, homemade pudding, southern dessert, creamy banana dessert

