
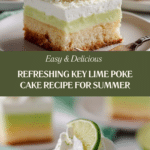
Key Lime Poke Cake Recipe
Introduction
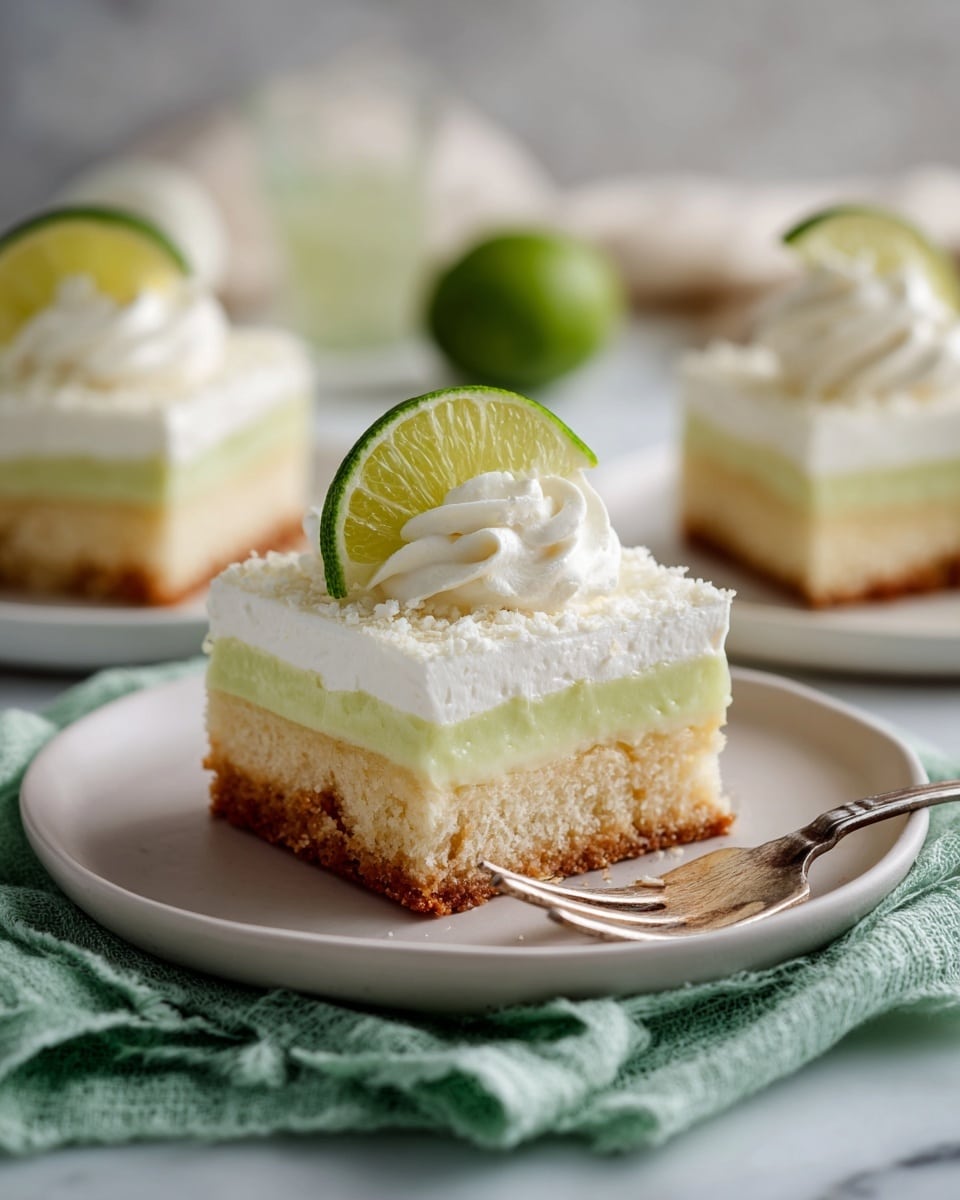
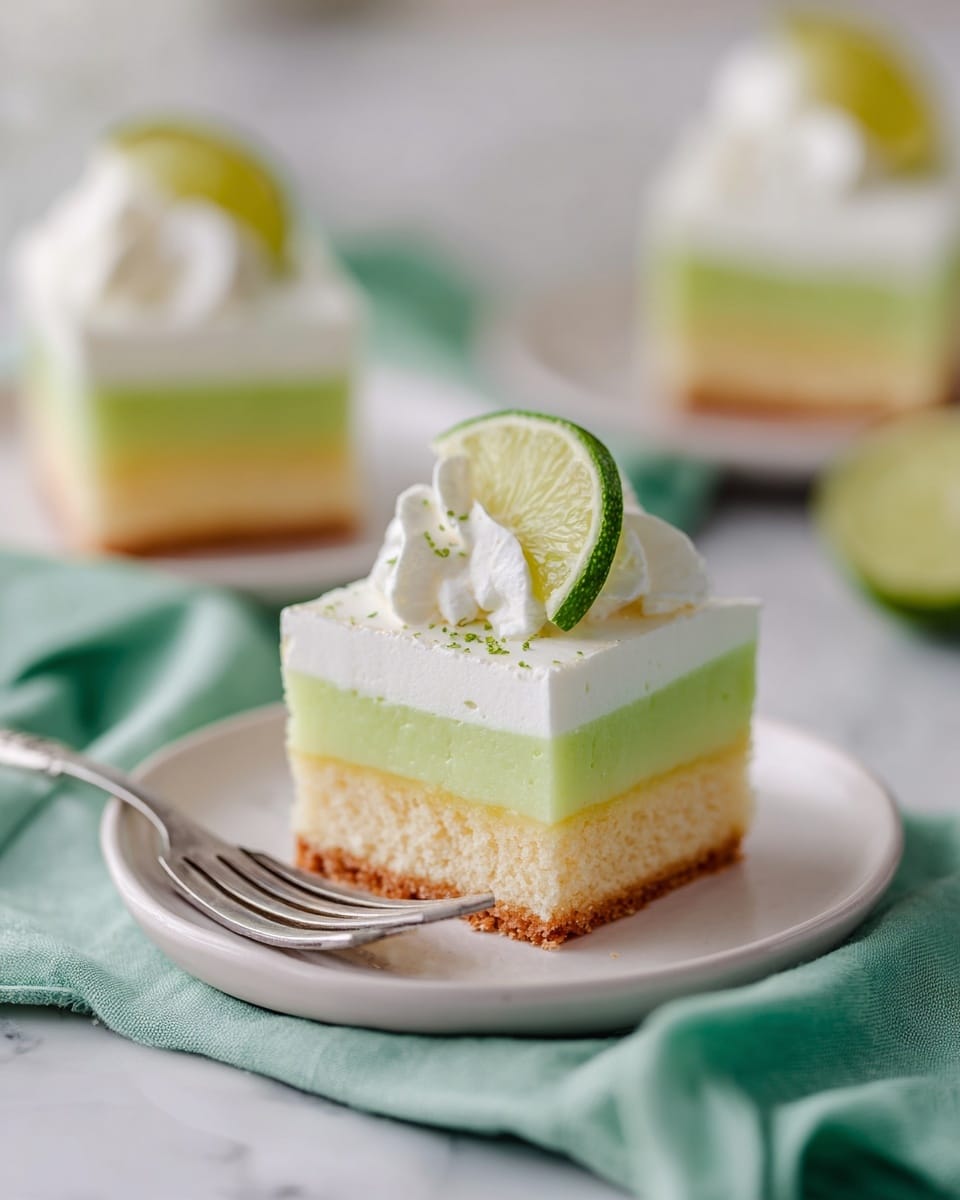
This Key Lime Poke Cake is a refreshing and tangy dessert that’s perfect for warm days or any time you crave a citrusy treat. The cake soaks up a luscious lime filling, topped with fluffy whipped cream for a delightful finish. Easy to make and sure to impress your guests.
Ingredients
- 1 box white cake mix, plus ingredients listed on the box
- 1 (14 ounce) can sweetened condensed milk
- 1 (12 ounce) can evaporated milk
- 2/3 cup Key lime juice (bottled or fresh)
- Yellow and green food coloring (optional, see note)
- 2 teaspoons lime zest, plus more for garnish
- 2 cups heavy whipping cream
- 2 tablespoons granulated sugar
- Slices of lime (for garnish, optional)
Instructions
- Step 1: Prepare the white cake in a 9 x 13 inch pan according to the box instructions. Let the cake cool for 5 to 10 minutes.
- Step 2: Using the handle of a wooden spoon about 1/2 inch in diameter, poke holes in the cake about 1 inch apart. Make sure to push the handle all the way to the bottom, twist, then pull back up. This allows the filling to soak deeply.
- Step 3: In a medium bowl, whisk together the sweetened condensed milk, evaporated milk, and lime zest. Add the Key lime juice and optional food coloring, then whisk until combined. The mixture will thicken immediately, which is normal.
- Step 4: Pour the lime filling over the cake, using a rubber spatula to spread it evenly across the surface and down the sides, filling all the holes.
- Step 5: Loosely cover the cake with foil or plastic wrap and refrigerate for 2 hours or up to 1 day. This allows the filling to soak in and firm up. Once firm, the cake surface will no longer be wet.
- Step 6: To make the whipped cream topping, combine the heavy whipping cream and granulated sugar in a large bowl or stand mixer. Beat on high speed until stiff peaks form, about 3 to 4 minutes.
- Step 7: Spread the whipped cream evenly over the cake. Garnish with extra lime zest and lime slices if desired. Serve immediately.
Tips & Variations
- For a more vibrant look, add a few drops of yellow and green food coloring to the lime filling mixture.
- Use fresh Key lime juice if possible for the best authentic flavor, though bottled juice works well too.
- If you prefer a tangier cake, add an extra teaspoon of lime zest to the filling.
- Make the cake a day ahead to allow the flavors to fully meld and the texture to improve.
Storage
Store the cake covered in the refrigerator for up to 3 days. Keep it chilled to maintain the creamy texture of the whipped topping and filling. When ready to serve, you can let it sit at room temperature for about 15 minutes for easier slicing, but it’s best enjoyed cold.
How to Serve
Serve this delicious recipe with your favorite sides.
FAQs
Can I use regular lime juice instead of Key lime juice?
Yes, regular lime juice works well as a substitute, though the flavor will be slightly different. Key lime juice has a unique tartness that gives this cake its signature taste.
Can I make this cake gluten-free?
Yes, by using a gluten-free white cake mix, you can easily adapt this recipe to be gluten-free without sacrificing flavor or texture.
Print
Key Lime Poke Cake Recipe
- Total Time: 2 hours 45 minutes
- Yield: 12 servings 1x
Description
This refreshing Key Lime Poke Cake combines a moist white cake with a zesty Key lime filling that soaks deeply into the cake’s pores, topped with fluffy homemade whipped cream. The perfect balance of tart and sweet, this dessert is ideal for summer gatherings or anytime you crave a citrusy treat.
Ingredients
Cake
- 1 box white cake mix, plus ingredients listed on the box
Key Lime Filling
- 1 (14 ounce) can sweetened condensed milk
- 1 (12 ounce) can evaporated milk
- 2/3 cup Key lime juice (bottled or fresh)
- 2 teaspoons lime zest, plus more for garnish
- Yellow and green food coloring (optional)
Whipped Cream Topping
- 2 cups heavy whipping cream
- 2 tablespoons granulated sugar
- Slices of lime (for garnish, optional)
Instructions
- Prepare the Cake: Follow the instructions on the box to make the white cake batter and bake it in a 9 x 13 inch pan. Allow the cake to cool for 5–10 minutes to slightly warm but not fully cool.
- Poke Holes: Using the handle of a wooden spoon about 1/2 inch in diameter, poke holes approximately 1 inch apart all over the cake. Ensure each hole goes down to the bottom by twisting the spoon before pulling it back up. This helps the filling penetrate deeply.
- Make Key Lime Filling: In a medium bowl, whisk together the sweetened condensed milk, evaporated milk, and lime zest. Stir in the Key lime juice and optional yellow and green food coloring to achieve desired color. The mixture will thicken immediately after adding lime juice—this is normal.
- Add Filling to Cake: Pour the Key lime mixture evenly over the cake. Using a rubber spatula, gently spread the filling across the surface and sides, ensuring all holes are filled thoroughly.
- Refrigerate: Loosely cover the cake with foil or plastic wrap and refrigerate for at least 2 hours or up to 1 day. This allows the filling to soak in and firm up.
- Whip Cream Topping: In a large bowl or stand mixer, beat the heavy whipping cream and granulated sugar on high speed for 3–4 minutes until stiff peaks form.
- Finish and Serve: Spread the whipped cream evenly over the chilled cake. Garnish with additional lime zest and lime slices if desired. Serve immediately for best texture and flavor.
Notes
- For make-ahead instructions, the cake can be prepared a day in advance and refrigerated after adding the filling.
- Use a wooden spoon handle about 1/2 inch diameter to ensure large holes for filling absorption.
- Food coloring is optional; it helps enhance the lime color for a more vibrant presentation.
- The filling will thicken after lime juice is added—this is expected and important for soaking.
- Whipped cream can be sweetened more or less to taste.
- Prep Time: 20 minutes
- Cook Time: 30 minutes
- Category: Dessert
- Method: Baking
- Cuisine: American
Keywords: Key Lime Poke Cake, lime dessert, poke cake, white cake, citrus cake, whipped cream topping, summer dessert

